
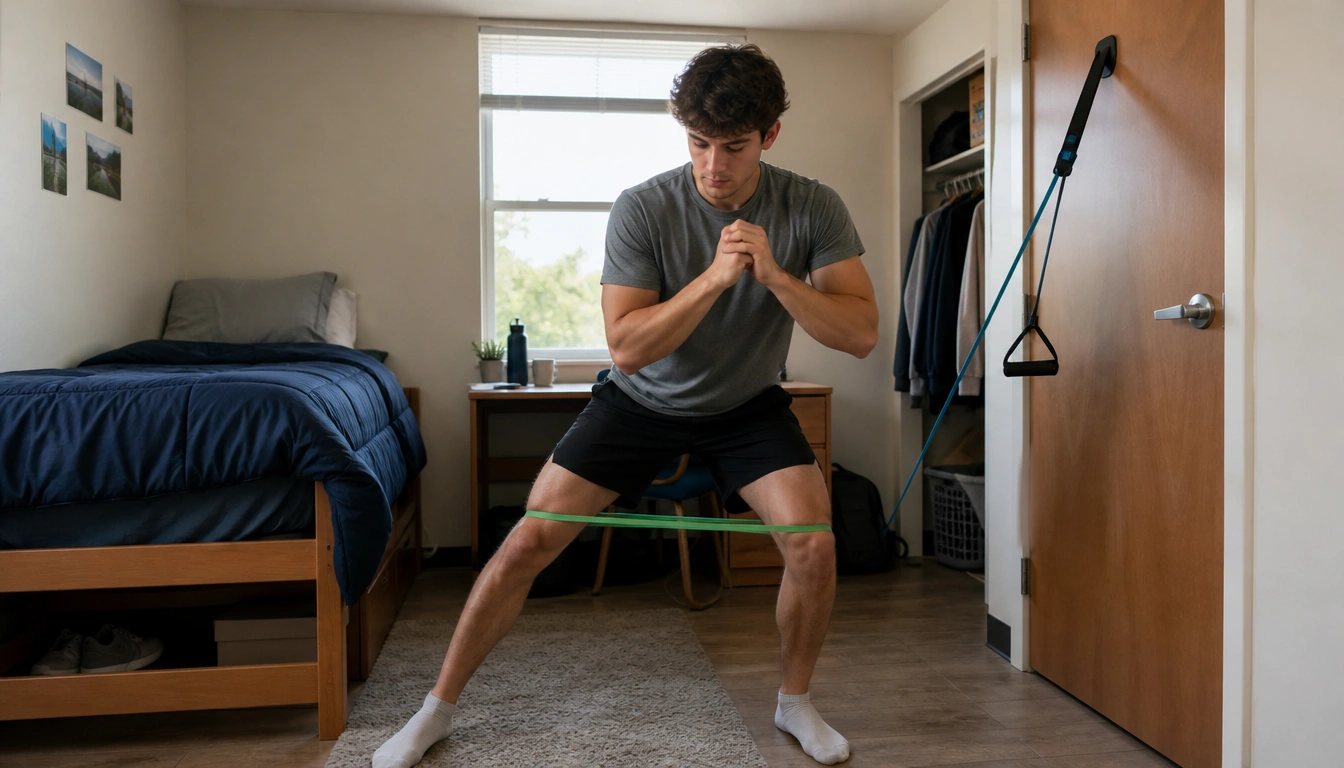
A practical resistance band routine for college students is a 15–20 minute full-body circuit done 2 non-consecutive days per week, with an optional single-set “exercise snack” on busy days. The best starter setup uses a squat, row, press, and glute bridge, then progresses by changing stance, band length, tempo, or resistance instead of buying more gear.
Key Takeaways
- A short resistance band routine can build strength without a gym if you train consistently and work close to a challenging effort level.
- A 4-move full-body circuit fits most dorm rooms or apartments and covers the legs, back, chest, shoulders, and glutes.
- You can progress on a student budget by narrowing your stance, shortening the band, choosing a thicker band, or slowing the lowering phase.
- For exam weeks, a single set of bands still helps maintain momentum and is better than waiting for a perfect workout window.
- Safety matters: inspect bands, anchor doors correctly, control the return phase, and stop if you feel sharp or unusual pain.
Why resistance bands fit student life
Resistance band starter routine for college students works well because the equipment is cheap, light, and easy to store in a backpack, desk drawer, or dorm closet. That makes it more realistic than a setup that depends on a gym commute, a crowded weight room, or a lot of floor space. For most beginners, the main goal is not a perfect program; it is building a habit you can repeat on ordinary weekdays.
According to the American College of Sports Medicine, moving from no resistance training to regular resistance training is a major step for strength, function, and long-term health. Bands are useful because they let you train major muscle groups with enough challenge to create progress, even when time and space are limited. Research and exercise guidance also support elastic resistance as a legitimate training tool when you use good form and enough effort.
The practical advantage is consistency. If a routine is short enough to finish between classes, it is more likely to happen. That is often more valuable for a new lifter than a complicated split that falls apart during midterms.
What to have before you start
You do not need a large collection of equipment. A single loop band can work, and a set of tube bands with handles may feel easier for pressing and rowing movements. A mini-band can also help with glute work, but it is optional at the start. If you have access to a door anchor, it expands your exercise options and helps with rows, presses, and face-pull-style movements.
Before each session, take a quick setup check:
- Look for cracks, dry spots, tears, or thinning rubber.
- Check the handles and anchor points for wear.
- Make sure the floor is clear of books, chargers, and loose cords.
- If using a door anchor, confirm the door is fully latched and will not swing open.
- Choose a space where you can step back without hitting furniture or walls.
If a band looks damaged, replace it rather than testing it under tension. That small habit reduces avoidable risk and keeps the workout simple.
The four-move starter circuit
This routine covers the main movement patterns that matter most for beginners: squatting, pulling, pressing, and bridging. That gives you a full-body session without needing a gym machine.
Band squat
Stand on the band with feet about shoulder-width apart. Hold the band at shoulder height or by the handles, brace your trunk, and sit your hips back and down. Keep your chest up and knees tracking comfortably over your toes. Stand back up with control.
Row
Loop the band around your feet while sitting on the floor, or anchor it in a door if available. Pull your elbows back close to your sides and squeeze your shoulder blades gently together. Rows are helpful for posture because they train the upper back after long study sessions.
Overhead press or floor press
For an overhead press, stand on the band and press both hands upward until the arms are straight, then lower with control. If overhead work feels awkward, do a floor press instead by lying on your back and pressing upward from chest level. Choose the version that lets you keep your shoulders comfortable and your ribs from flaring excessively.
Banded glute bridge
Lie on your back with knees bent and feet flat. Place a mini-band above the knees if you have one, or do the bridge without it. Drive through your heels, lift the hips, and gently press the knees outward. Pause briefly at the top, then lower slowly.
If you are brand new, start with one round of these four exercises and add a second round later in the week. The point is to leave the session feeling like you worked, not wrecked.
How much to do in a session
A good beginner target is 1 to 2 working sets per exercise, using about 8 to 12 controlled repetitions per set. Rest for about 60 to 90 seconds between exercises or as needed to keep your form steady. The final few repetitions should feel challenging, but you should still have a little reserve rather than grinding through ugly reps.
For most students, a full session takes about 15 to 20 minutes. That is long enough to create a real training stimulus and short enough to fit into a busy day. If you have not trained before, start near the lower end of the volume range and increase gradually as your tolerance improves.
Use effort as your guide. If every set feels easy, the band may be too light, the range of motion may be too short, or you may need more tension. If form breaks down early, make the movement easier or reduce the band tension.
How to fit it into student life
The best schedule is the one you can repeat. A simple weekly plan is two full-body sessions on non-consecutive days, such as Monday and Thursday. That spacing gives your muscles time to recover and makes it easier to stay consistent around classes, labs, and social plans.
On normal days, do the full circuit. On exam weeks, use “exercise snacks” to keep the habit alive: one set of rows between study blocks, one set of squats after class, or one quick round of the full circuit before showering. A single set is not the same as a full workout, but it is still useful when your schedule is tight. It also lowers the chance that a hectic week turns into a two-week break.
If you study late, keep the routine close to another existing habit. For example, do it right after you return to your room, after brushing your teeth in the evening, or before you start your first assignment of the day. Habit stacking reduces the need for motivation.
How to make it harder without buying more gear
You do not need a heavier rack of equipment to keep progressing. Bands are especially flexible because you can adjust the challenge in several budget-friendly ways.
- Change your stance. A narrower or more stable stance can make some movements harder to control, while a wider stance may increase tension in others.
- Shorten the band. Step wider on the band, hold it closer, or wrap a little more length around your hands to increase tension.
- Use a thicker band. If the same workout starts feeling easy, move up to a stronger resistance level.
- Slow the tempo. Lower the band for about 2 to 3 seconds instead of letting it return quickly.
- Increase range of motion when possible. Use the deepest comfortable squat, the fullest safe press, or a longer row without losing position.
You can also make the movement feel harder by cleaning up the technique. A fuller squat depth, a more controlled row, or a slower lowering phase often produces a better training effect than chasing a flashy exercise.
Safety basics for dorms and apartments
Most band problems are preventable. Start with the band itself: inspect it before every session, especially if it has been stored in heat, sunlight, or a cramped backpack pocket. If you see wear, retire it.
Door anchoring deserves extra caution. Use a door that closes firmly and opens away from you if possible, so it is less likely to swing open under tension. The anchor should sit securely on the opposite side of the door, and the door should remain closed throughout the set. Never loop a band around a sharp edge, unstable furniture, or anything that can slide unexpectedly.
During the exercise, control the eccentric phase, which is the lowering portion. Do not let the band snap back. That can stress the joints and increase the chance of losing your grip. Smooth control on the way down is part of the workout, not an optional extra.
Stop and reassess if you feel sharp pain, joint pain that does not feel like normal muscle effort, radiating discomfort, numbness, or a sudden pull that changes your movement. Mild effort, fatigue, and muscle burn are normal; sudden or unusual pain is not. If you are dealing with a prior injury or a chronic condition, it is reasonable to get individual advice from a campus health clinician or physical therapist before pushing the routine forward.
Simple recovery and habit-stacking strategies
Recovery for busy students does not need to be complicated. Hydration matters, especially if you are training between classes, walking a lot, or spending long hours in dry indoor spaces. Keeping a water bottle nearby makes it easier to drink regularly without turning recovery into another task.
Food-first recovery is usually enough for short band sessions. After training, aim for a normal meal or snack that includes protein and carbohydrates from campus-friendly options such as eggs, yogurt, milk, tofu, beans, chicken, rice, potatoes, fruit, or a sandwich. The goal is to support recovery and energy, not to chase a supplement-heavy plan that is unrealistic on a student budget.
Use the workout to anchor the rest of your day. Many students do better when the routine is linked to something already automatic: after showering, before dinner, or right before leaving for class. That kind of pairing makes the habit feel smaller and easier to repeat, which is often the real reason students succeed with a home program.
Frequently Asked Questions
How many days per week should a beginner college student train with resistance bands?
For most beginners, two non-consecutive days per week is a strong starting point. That matches standard resistance-training guidance and gives you enough recovery time to keep the routine manageable during a busy semester.
What are the safest resistance band exercises to start with in a dorm room or apartment?
A squat, row, press, and glute bridge are good starter moves because they are simple, space-friendly, and easy to scale. Keep the setup stable, use controlled reps, and choose versions that let you maintain good form.
How do I make a resistance band workout harder without buying heavier equipment?
Increase tension by shortening the band, changing your stance, slowing the lowering phase, improving range of motion, or using a thicker band if you already have one. Those changes can raise the challenge without adding much cost.
How can I fit resistance band training into an exam-week schedule?
Use short exercise snacks instead of waiting for a perfect free hour. One set of squats, rows, or a quick full circuit between study blocks can help you maintain the habit when your schedule is packed.
What should I check before using resistance bands to avoid injury?
Inspect the band for cracks, thinning, or wear, and make sure any door anchor is attached to a fully latched door that will not swing open. If the band is damaged or the setup feels unstable, do not use it.
The Bottom Line
A resistance band routine can absolutely work for college students if it is short, repeatable, and focused on the basics. Two full-body sessions per week is enough to start building strength, and short “exercise snacks” can help on hectic days.
Keep the program simple: squat, row, press, and glute bridge. Progress by adjusting stance, tension, tempo, or range of motion instead of relying on more equipment. Just as important, use safe setup habits and easy recovery routines so the plan fits real student life.
Medical disclaimer
Medical disclaimer: This content is for educational and informational purposes only and is not a substitute for professional medical advice, diagnosis, or treatment. Dietary needs and supplement suitability vary by individual.
