
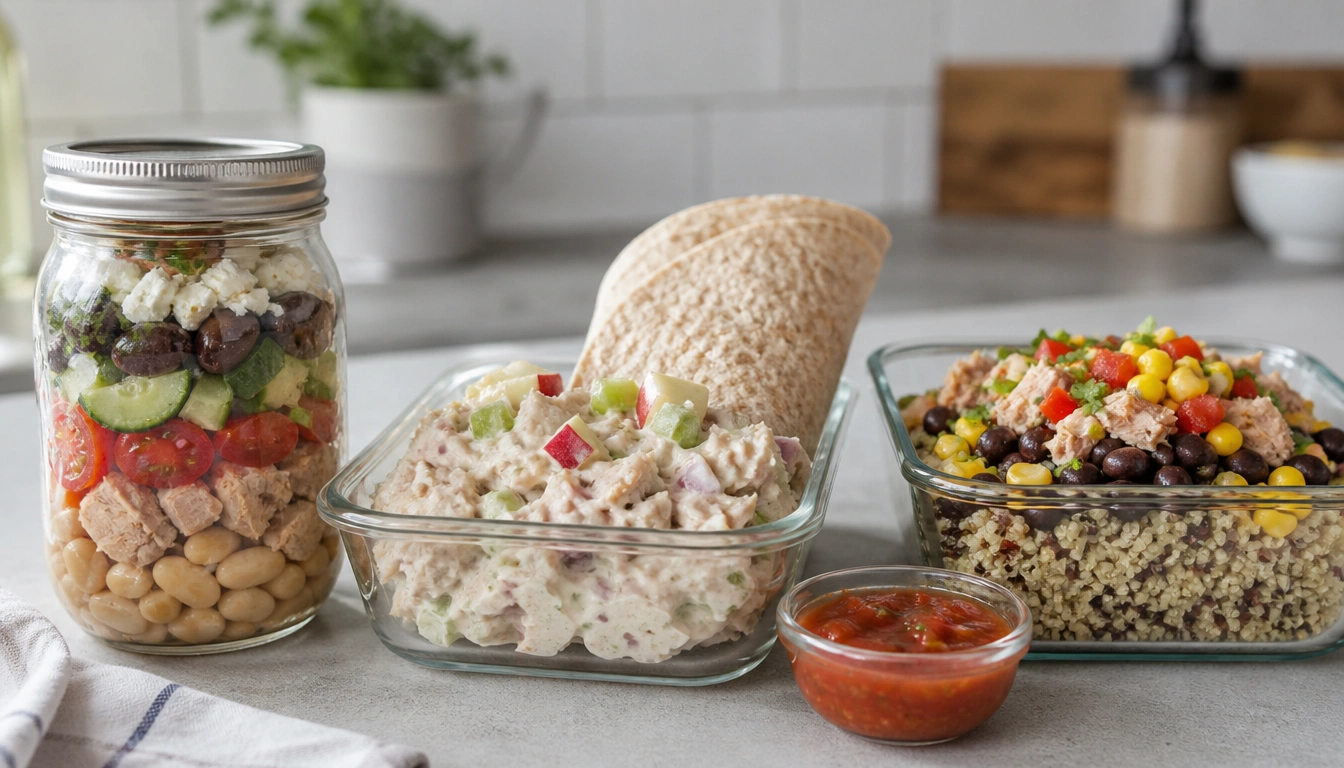
The easiest tuna lunch ideas for meal-prep beginners are simple, component-based meals built with canned light tuna, sturdy grains or beans, and separate wet ingredients. The best options include a Mediterranean tuna-and-bean jar, a Greek yogurt tuna wrap filling, and a Southwestern tuna-quinoa bowl. They’re affordable, high in protein, and easier to keep fresh when you prep the parts separately and assemble them at eating time.
Key Takeaways
- Canned light tuna is the best beginner choice for frequent meal prep because it is lower in mercury than albacore and works well in cold lunches.
- The fastest way to avoid soggy tuna lunches is to keep watery vegetables, dressings, and salsa separate until mealtime.
- Beans, quinoa, brown rice, and whole-grain wraps help tuna lunches hold texture and feel more filling without much extra work.
- Greek yogurt can replace some or all mayonnaise in tuna salad for a lighter, tangy filling.
- Most prepared tuna lunches are best eaten within 3 to 4 days when refrigerated properly and kept cold until lunch.
- If you are pregnant or breastfeeding, choose lower-mercury tuna more often and limit albacore according to official guidance.
Why tuna works so well for meal-prep beginners
Simple tuna lunch ideas work because canned tuna gives you a ready-to-use protein base with almost no cooking. That matters for beginners who want a lunch they can make in one short session and repeat through the workweek. Tuna also pairs easily with pantry staples like beans, grains, crackers, yogurt, and shelf-stable seasonings, so you do not need an advanced recipe list to build something satisfying.
For meal prep, the real advantage is structure. A one-off tuna sandwich can taste fine right away, but a lunch planned for Wednesday needs ingredients that stay balanced after a day or two in the fridge. That means using foods with enough texture to handle storage and choosing add-ins that improve flavor without turning watery.
Think of tuna lunch prep as a formula: protein plus a sturdy base plus a flavorful accent. Once you have that pattern, you can make multiple lunches from the same shopping list without feeling like you are cooking different meals all week.
Set up your pantry for easy tuna lunches
Start with canned light tuna or pouched tuna in water if you want the most flexible meal-prep option. It has a milder flavor, works in salads and bowls, and is usually the better choice for people who want to use tuna more often. Oil-packed tuna can be tasty too, especially if you like a richer texture, but it may make lunches heavier and can add extra calories before you intend it.
Next, choose one or two sturdy bases. Good options include chickpeas, cannellini beans, black beans, quinoa, brown rice, whole-wheat pasta, whole-grain wraps, and crisp romaine. These ingredients hold up better than delicate greens alone. They also make a tuna lunch feel complete, not just like a scoop of salad.
For shelf-stable add-ins, keep a few basics on hand: olive oil, lemon juice, mustard, pepper, dried herbs, salsa, relish, canned beans, microwave-ready grains, and nuts or seeds. Those items let you vary flavor without adding much prep time. If you want extra crunch, apples, celery, cucumbers, and shredded carrots can help, but they are best used with a little restraint so the lunch does not get watery.
The anti-soggy meal-prep method
The main reason tuna lunches go soggy is moisture migration. Watery produce and dressing left in contact with greens, bread, or grains pull liquid into the food and soften it. That is why a tuna lunch that tastes bright on day one can become limp by day three. The fix is not complicated: keep wet ingredients separate until you are ready to eat.
Component-based prep works best for beginners. Mix tuna with beans, grains, or yogurt in one container, and keep delicate items like lettuce, tomatoes, cucumbers, salsa, or dressing in another compartment or a small side container. If you are making a wrap or sandwich, pack the filling separately from the bread and assemble at lunch. That single habit makes a big difference in texture.
Another helpful move is to use ingredients that absorb flavor instead of collapse. Beans and grains are especially useful because they hold up in the fridge while soaking in seasoning. If you want tomatoes or cucumbers, dice them small, remove extra seeds or liquid when possible, and use them as a garnish rather than the main bulk of the lunch. That keeps the meal fresh longer and prevents a watery bottom of the container.
Three beginner tuna lunch formulas that hold up well
The first easy option is a Mediterranean tuna-and-bean jar. Mix drained tuna with rinsed cannellini beans or chickpeas, a little olive oil, lemon juice, oregano, and black pepper. Add chopped cucumber or tomato only if you can remove some of the moisture first. If you like greens, layer them on top or pack them separately. This style is especially good when you want something that feels like a salad but still eats well on Friday.
The second formula is a Greek yogurt apple tuna wrap filling. Stir tuna with plain Greek yogurt, finely diced apple, and a few almonds or walnuts for crunch. The yogurt gives you creaminess without relying on a lot of mayonnaise, and the apple adds sweetness and texture. Pack the filling separately from whole-grain pita, wraps, or romaine leaves, then assemble at lunch so the bread or lettuce stays intact.
The third option is a Southwestern tuna-quinoa power bowl. Combine tuna with cooked quinoa or brown rice, rinsed black beans, and a spoonful of salsa or pico de gallo packed separately. Microwave-ready grains make this especially beginner-friendly. If you want to warm the bowl, heat the grain-and-tuna mixture first and add the salsa after warming. That keeps the texture cleaner and the flavor brighter.
How to scale the same tuna lunch for different goals
You do not need separate recipes for every appetite. The same tuna base can be adjusted with a few simple swaps. For a lighter lunch, build around greens, cucumber, celery, and a small amount of dressing or yogurt. For a meal that feels fresher and less dense, keep the grain portion small and add extra crunchy vegetables.
For a higher-fiber lunch, lean on beans, lentils, whole grains, and vegetables. A tuna-bean jar or tuna-quinoa bowl is a good fit because the fiber comes from the base, not from complicated cooking. If you want more staying power without a lot of extra prep, add chickpeas, black beans, or brown rice before you reach for richer toppings.
For a more filling lunch, add avocado, seeds, olives, nuts, or a larger grain portion. Those ingredients help if you are active, have a longer gap between meals, or simply want lunch to feel substantial. If you want a higher-protein version, keep the tuna as the main ingredient and use Greek yogurt instead of mayo, then add beans or a side of cottage cheese if that fits your plan. The trick is to change one part of the formula at a time so prep stays simple.
Tuna type and mercury: what to choose often and what to limit
For most meal-prep beginners, canned light tuna is the most practical choice. The U.S. Food and Drug Administration and the Environmental Protection Agency classify it as a lower-mercury option, which makes it easier to use in regular lunch rotation. It also tends to be less expensive than albacore and works well in the kinds of mixed lunches people prep for work.
Albacore, sometimes labeled white tuna, contains more mercury than canned light tuna. That does not mean it is off-limits for everyone, but it is the better fish to use less often, especially if you are pregnant, breastfeeding, or feeding young children. Official guidance from U.S. agencies recommends being more cautious with higher-mercury fish and limiting albacore more tightly than canned light tuna.
If you want tuna several times a week, keep most of those lunches based on canned light tuna and use other protein options on some days. That approach lets you enjoy tuna meal prep without leaning too hard on the higher-mercury varieties.
Food safety and storage rules for the workweek
Fish, dairy, and mayonnaise-based lunches need temperature control. Keep tuna meal prep refrigerated at or below 40°F, and do not leave it out at room temperature for more than two hours. If the weather is hot, use an insulated lunch bag and an ice pack, especially if your commute is long or your office fridge is unreliable.
For most assembled tuna salads or tuna bowls, the safest practical window is 3 to 4 days in the refrigerator when stored in airtight containers. If you are using delicate greens or watery vegetables, quality may drop before safety does, so plan to eat the most fragile lunches earlier in the week. You can also prep dry components ahead and mix them fresh midway through the week for better texture.
Throw the lunch away if it smells off, looks discolored, or the container has a bulging lid or seal problem. A sharp, unpleasant ammoniacal odor is another warning sign. When in doubt, do not taste-test a questionable tuna lunch. Safe storage matters more than saving one serving.
Beginner swaps and no-cook lunch box fixes
If you only have mayonnaise, you can still make tuna salad. Use a small amount and balance it with lemon, mustard, black pepper, celery, or chopped pickles if you have them. If you only have yogurt, use plain Greek yogurt for a tangier, lighter filling. If you only have lettuce, turn the tuna into lettuce cups instead of forcing a sandwich that may get soggy.
If you only have grain bowls, treat tuna as the protein topper and keep the grain base simple. A microwave-ready rice cup, a scoop of tuna, and a few beans or seeds can make a complete lunch without special equipment. For a no-cook lunch box, use canned tuna, canned beans, whole-grain crackers, fruit, and a separate dressing cup. That gives you a balanced meal with almost no kitchen time.
If you want a fast way to choose among the three main formulas, use this rule of thumb: the tuna-and-bean jar is best for fridge stability, the yogurt apple wrap filling is fastest to assemble at lunch, and the quinoa bowl is usually the most filling. All three can be made with pantry staples and repeated without feeling boring if you change the herbs, crunch, or base.
Frequently Asked Questions
How do I keep tuna meal-prep lunches from getting soggy by midweek?
Keep wet ingredients separate until lunch. Mix tuna with beans, grains, or yogurt, but pack dressing, salsa, tomatoes, cucumbers, and leafy greens apart from the main filling. Sturdy bases hold texture better than bread or delicate greens alone.
What type of tuna is best for meal prep if I want to limit mercury?
Canned light tuna is usually the best choice for regular meal prep because it is lower in mercury than albacore. If you plan to eat tuna often, use canned light more frequently and keep albacore for occasional meals.
How long can tuna salad or tuna bowls stay in the refrigerator safely?
Most prepared tuna lunches are best used within 3 to 4 days when stored in airtight containers in the refrigerator at or below 40°F. If they smell off, look discolored, or the container is damaged, throw them out.
Can I make tuna lunches with yogurt instead of mayonnaise?
Yes. Plain Greek yogurt works well in tuna salad and gives a creamy texture with a tangier flavor. It pairs especially well with apple, celery, mustard, herbs, and nuts or seeds for crunch.
What are the best tuna lunch add-ins for more fiber, crunch, or extra calories?
For more fiber, use beans, quinoa, brown rice, or other whole grains. For crunch, try celery, apples, cucumbers, nuts, or seeds. For extra calories, add avocado, olive oil, olives, or a larger grain portion.
The Bottom Line
Simple tuna lunch ideas work best when you treat them as a prep system, not a single recipe. Choose canned light tuna, add a sturdy base like beans or grains, and keep dressings and watery vegetables separate until eating time.
That approach helps lunches stay fresher, makes them easier to pack, and gives you room to adjust for lighter, higher-fiber, or more filling meals. If you keep storage rules in mind and rotate tuna types wisely, tuna can be one of the easiest workweek lunch staples for beginners.
Medical disclaimer
Medical disclaimer: This content is for educational and informational purposes only and is not a substitute for professional medical advice, diagnosis, or treatment. Dietary needs and supplement suitability vary by individual.
Sources
- U.S. Government / Health Authority — epa.gov. Accessed November 2026.
- U.S. Food and Drug Administration (FDA) — fda.gov. Accessed November 2026.
- recipes.heart.org — heart.org. Accessed November 2026.
- eatright.org — eatright.org. Accessed November 2026.
